Run an Ansible Lab on Your Laptop with Docker (Mac, Windows, Linux)

Introduction
The number one reason people give up on learning Ansible is not Ansible. It is the lab. "I need three servers", "I don't have a cloud account", "my free tier expired", "the IPs changed again".
So for my Ansible course I built a lab that runs entirely on your laptop, for free, and behaves like three real Ubuntu servers:
- Three containers named
ansible-lab-server-1,-2and-3 - Each one runs systemd and sshd, so
service,apt,user,template, handlers, Vault, Galaxy, all of it works like on a VM - One SSH key, kept inside the project folder
- Same commands on macOS, Windows (WSL 2) and Linux
In this post we are going to:
- Set up the prerequisites
- Clone the lab and create the SSH key
- Start the three servers with Docker Compose
- Run your first playbook against them
- Prove it is a real server (install nginx)
- Day-to-day: stop, start, reset
- Free alternatives if you do not want Docker
- Troubleshooting
Everything below lives in the GitHub repository of the course: ansible-zero-to-expert-masterclass.
1. Prerequisites
You need two things on your machine:
Docker
- macOS / Windows: Docker Desktop
- Linux: Docker Engine with the Compose plugin
Ansible on the same machine (this is your control node). If you have not installed it yet, the repo has step-by-step guides for macOS / Linux and Windows with WSL.
Verify both:
1docker --version
2docker compose version
3ansible --version
Windows users: run every command in this post inside your WSL Ubuntu terminal, not PowerShell. In Docker Desktop go to Settings → Resources → WSL integration and enable your Ubuntu distro. After that there is no difference between Windows, Mac and Linux.
2. Clone the lab and create the SSH key
1git clone https://github.com/rahulwagh/ansible-zero-to-expert-masterclass.git
2cd ansible-zero-to-expert-masterclass
Ansible talks to servers over SSH, so we need a key pair. We keep it inside the repo folder under util/keys/. That folder is gitignored, so you can never commit the private key by accident, and everything for the course stays in one place.
1ssh-keygen -t ed25519 -f util/keys/ansible-lab -N ""
2ls util/keys
3# ansible-lab  ansible-lab.pub  README.md
The public key (ansible-lab.pub) will be installed inside every lab server. The private key never leaves your laptop.
3. Start the three servers
1cd util/lab-local-docker
2cp .env.example .env
3docker compose up -d --build
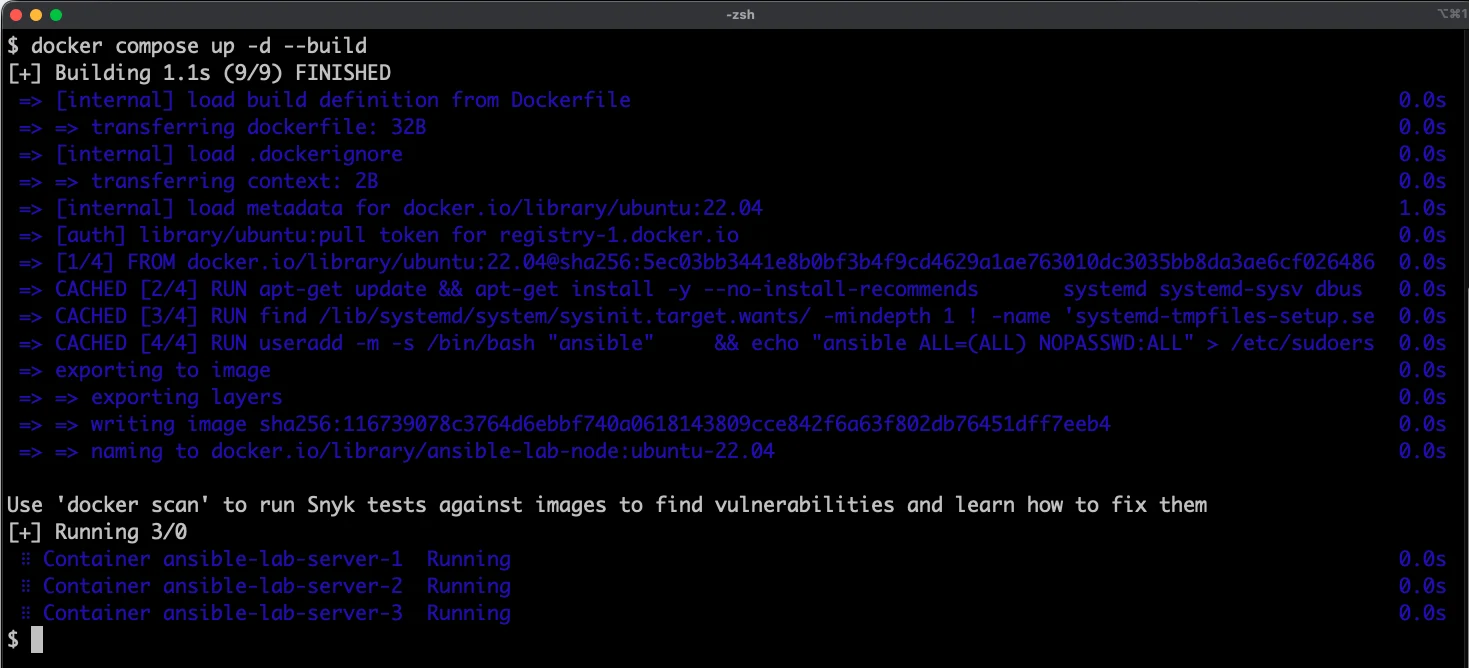
The first run builds the image (about two minutes); after that it starts in seconds. The screenshot below is from my own machine while recording the course lecture, so the image is already cached and the build finishes in about a second. Let's look at what you just started:
1docker compose ps
1NAME                   STATUS
2ansible-lab-server-1   Up
3ansible-lab-server-2   Up
4ansible-lab-server-3   Up
Each container maps two ports to your laptop:
| Server | SSH | HTTP |
|---|---|---|
| ansible-lab-server-1 | 127.0.0.1:2221 | http://localhost:8081 |
| ansible-lab-server-2 | 127.0.0.1:2222 | http://localhost:8082 |
| ansible-lab-server-3 | 127.0.0.1:2223 | http://localhost:8083 |
And yes, that is a real systemd inside:
1docker exec ansible-lab-server-1 systemctl is-active ssh
2# active
3
4docker exec ansible-lab-server-1 systemctl list-units --type=service --no-pager | head

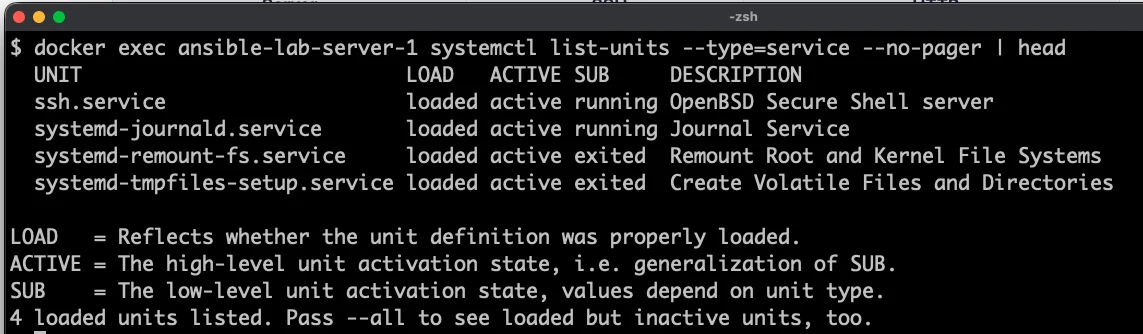
One thing to know so it does not confuse you: if you run systemctl status <service> inside one of
these containers, the first line of output on Docker Desktop is
1Failed to dump process list for 'ssh.service', ignoring: Input/output error
followed by the normal status (Active: active (running)). That line is harmless. systemctl status
tries to read the service's process list from the cgroup, which a container with a private cgroup
namespace does not expose, and systemd says "ignoring" and carries on. Nothing is broken; is-active
and list-units above give you the same answer without the noise.
What is in the docker-compose.yml?
Three things make this work, and they are the same three things that make most "systemd in Docker" attempts fail when they are missing:
 1x-lab-node: &lab-node
 2  image: ansible-lab-node:ubuntu-22.04
 3  build: .
 4  privileged: true          # systemd needs this
 5  stop_signal: SIGRTMIN+3   # clean systemd shutdown
 6  tmpfs:
 7    - /run
 8    - /run/lock
 9    - /tmp
10  volumes:
11    - /sys/fs/cgroup:/sys/fs/cgroup:rw
12    - ${SSH_PUBLIC_KEY_FILE}:/home/ansible/.ssh/authorized_keys:ro
privileged: trueplus the cgroup mount lets systemd run as PID 1.- The
tmpfsentries give systemd the writable runtime directories it expects. - Your public key is bind-mounted straight into the
ansibleuser'sauthorized_keys, so there is nothing to copy around.
The Dockerfile installs systemd, openssh-server, python3 and sudo on ubuntu:22.04, creates the ansible user with passwordless sudo, and strips the systemd units that cannot run in a container.
4. Run your first playbook
First, a ping with the inventory that ships with the lab:
1ansible -i inventory.ini all -m ping
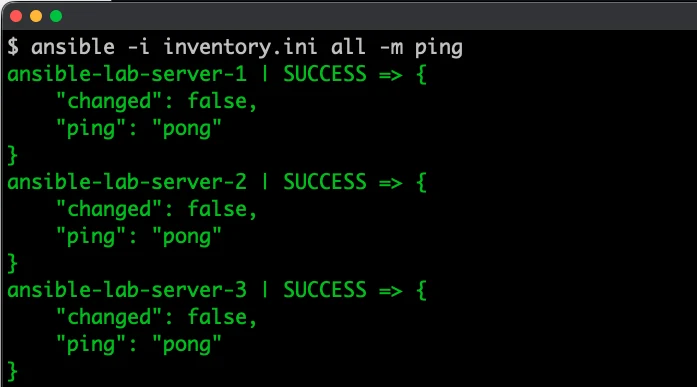
Look at that inventory for a second, because this is the only difference between the local lab and cloud VMs:
 1[webservers]
 2ansible-lab-server-1 ansible_host=127.0.0.1 ansible_port=2221
 3ansible-lab-server-2 ansible_host=127.0.0.1 ansible_port=2222
 4
 5[dbservers]
 6ansible-lab-server-3 ansible_host=127.0.0.1 ansible_port=2223
 7
 8[all:vars]
 9ansible_user=ansible
10ansible_ssh_private_key_file=../keys/ansible-lab
11ansible_python_interpreter=/usr/bin/python3
Same machine, different door. Now point every chapter of the course at these servers in one go. The repo has a small helper that rewrites the IP, port and key path in all eleven chapter inventories:
1cd ../..                               # back to the repo root
2python3 util/set-lab-hosts.py --docker
1updated  chapter-01-hello-ansible/inventory
2updated  chapter-02-inventory-deep-dive/inventory/hosts.ini
3...
411 inventory file(s) updated.
And run a real chapter playbook:
1cd chapter-01-hello-ansible
2ansible-playbook 01-ping-playbook.yml
3ansible-playbook 03-gather-facts-playbook.yml
5. Prove it is a real server
Still inside chapter-01-hello-ansible, install and start nginx on the two web servers with two ad-hoc commands:
1ansible webservers -b -m apt -a "name=nginx state=present update_cache=yes"
2ansible webservers -b -m service -a "name=nginx state=started enabled=yes"
Open http://localhost:8081 and http://localhost:8082. That is the nginx welcome page, served by two servers Ansible just configured, on your laptop. The second command is the service module talking to systemd inside the container, which is exactly why this lab behaves like real VMs and not like a plain ubuntu container.
6. Day-to-day: stop, start, reset
All of the above is wrapped in one script for everyday use:
1cd util/lab-local-docker
2./lab.sh up        # key (if missing) + build + start + rewire chapters + ping
3./lab.sh stop      # pause, keeps everything you installed
4./lab.sh start     # resume
5./lab.sh down      # delete the servers; next "up" gives you fresh ones
6./lab.sh ping
Unlike cloud VMs the addresses never change, so you never have to touch the inventories again.
7. Free alternatives if you do not want Docker
The same repo ships every one of these, with the same ansible user, the same key location and the same set-lab-hosts.py helper, so the course does not care which one you pick:
| Option | Cost | Folder in the repo |
|---|---|---|
| Multipass VMs on your laptop (real Ubuntu VMs, by Canonical) | Free | util/lab-local-multipass |
| Google Cloud (what I use in the course videos) | 1 × e2-micro always free, $300 credit for new accounts | util/lab-gcp |
| AWS | t3.micro free tier | util/lab-aws |
| Azure | B1s free tier, $200 credit | util/lab-azure |
| Oracle Cloud Always Free | Free forever, 4 ARM cores / 24 GB | any Ubuntu VM + set-lab-hosts.py |
| GitHub Codespaces | 60 free hours a month, Docker pre-installed | open the repo in a Codespace and follow this post |
For the cloud options Terraform prints the public IPs and a ready-made inventory block when it finishes:
1cd util/lab-aws            # or lab-gcp / lab-azure
2cp terraform.tfvars.example terraform.tfvars
3terraform init && terraform apply
4cd ../..
5python3 util/set-lab-hosts.py --server1 <ip-1> --server2 <ip-2> --server3 <ip-3>
The full guide with every option is in LAB-SETUP.md.
8. Troubleshooting
| Symptom | Fix |
|---|---|
Permission denied (publickey) | The key path in the inventory is wrong or the public key is not on the server. Check util/keys/ansible-lab exists and re-run python3 util/set-lab-hosts.py --docker. |
Docker is installed but not running | Start Docker Desktop, wait for the whale icon to settle, run ./lab.sh up again. |
System is booting up on SSH | The container is still starting systemd. Wait ten seconds and retry. |
Failed to dump process list for 'ssh.service', ignoring: Input/output error from systemctl status | Cosmetic, Docker Desktop only. The service is running; use systemctl is-active ssh for a clean answer. |
docker compose up complains about cgroup | You are on an old Linux host with cgroup v1. Add cgroup: host under x-lab-node in docker-compose.yml. |
Playbook says /usr/bin/python3: not found | Only happens on your own VMs. sudo apt-get install -y python3 on the server; the Docker and Terraform labs do this for you. |
| IPs changed (cloud VMs after stop/start) | Re-run set-lab-hosts.py with the new IPs. Local Docker never has this problem. |
Conclusion
Three real-enough servers, one folder, one key, one command, zero cost. If you are learning Ansible, start here and move to a cloud lab only when you want to practise the cloud-specific parts.
This lab is what every chapter of my Udemy course runs on: Ansible Zero to Hero: Playbooks, Templates, Galaxy & Vault. The code, the lab scripts and the Terraform for all three clouds are free on GitHub: rahulwagh/ansible-zero-to-expert-masterclass.
Posts in this series
- Run an Ansible Lab on Your Laptop with Docker (Mac, Windows, Linux)
- Ansible Handlers Explained - notify, listen, flush_handlers, Handler Order and Real-World Examples
- How to Use SSH Keys with Ansible for Secure Server Management?
- Why YAML is so important in Ansible?
- Clone Public and Private Git Repositories with Ansible
- ansible --limit - Run a Playbook on One Host, a Group or a Pattern (Exclude with !, Intersect with &, Wildcards, Ranges, @retry File) with Real Output from ansible-core 2.21
- Easy Fix for 'zsh command not found ansible' Error After Installing Ansible with Pip
- Demystifying Hosts, Inventory Roles, and Tasks
- Fixing-Unable to start service apache2 Job for apache2.service failed because the control process exited with error code?
- Why Ansible is the Ultimate Tool for DevOps Teams - A Beginner's Guide?
- fatal: destination path already exists and is not an empty directory - Ansible git module, 4 Fixes (and Proof That force=yes Is Not One of Them)
- Install Ansible on MacOS, Windows, Ubuntu(debian) and Fedora(rpm) - Part 1